penski61
22nd Expeditionary Group
Hero Member

 Offline Offline
Posts: 970
|
 |
« Reply #75 on: January 26, 2012, 07:56:49 PM » |
|
well by the end of next month i should have an atlas  , so i decided to go ahead and make dual cutting brakes so when i upgrade the front and do front digs i can brake each rear wheel individually for tighter turns  here is the dual levers im making up 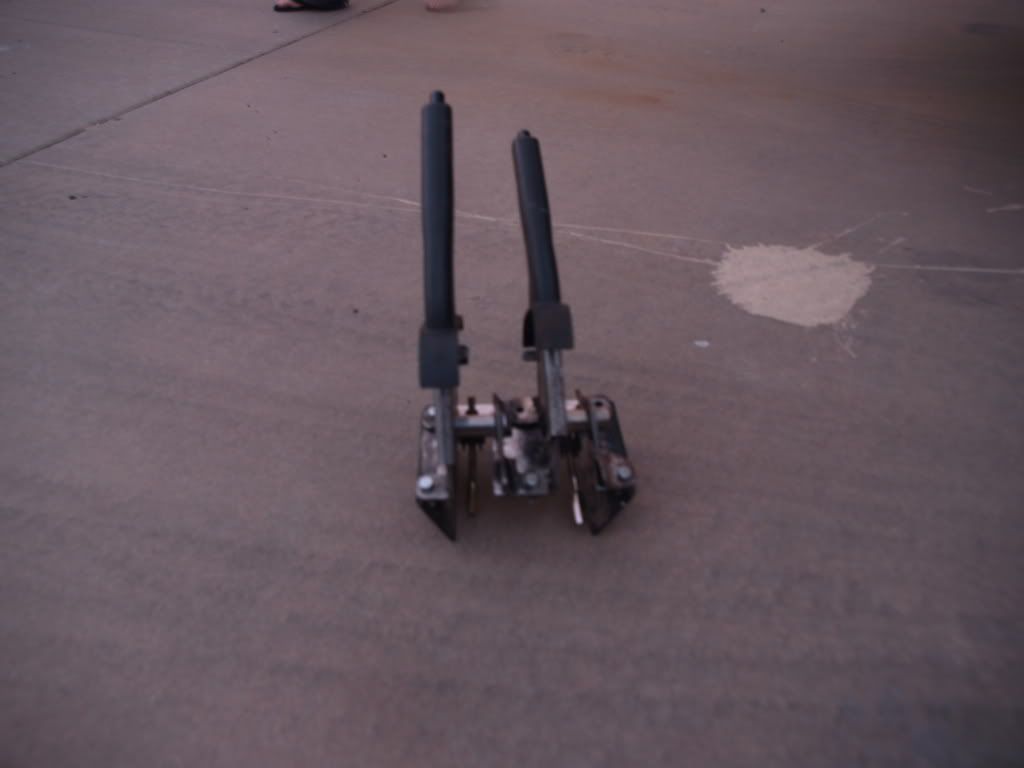 new center console with cutting brake levers , still need cut the holes for the cupholders then i can probably go ahead and paint this one , ill probably do a 2nd piece for the atlas shifters 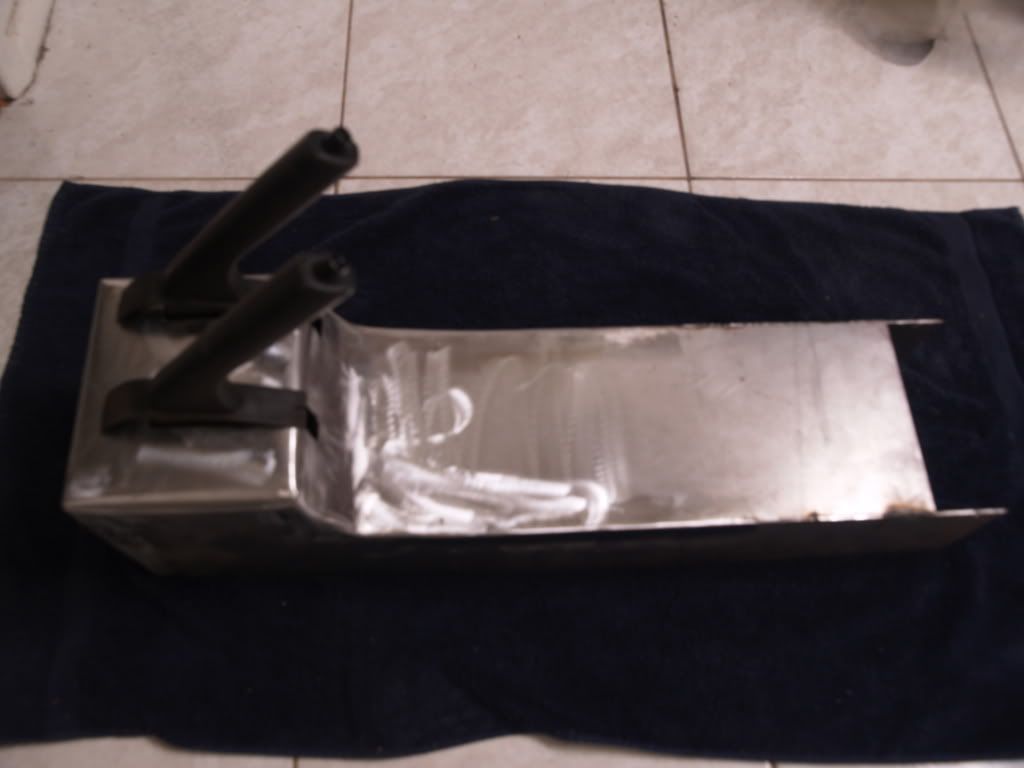 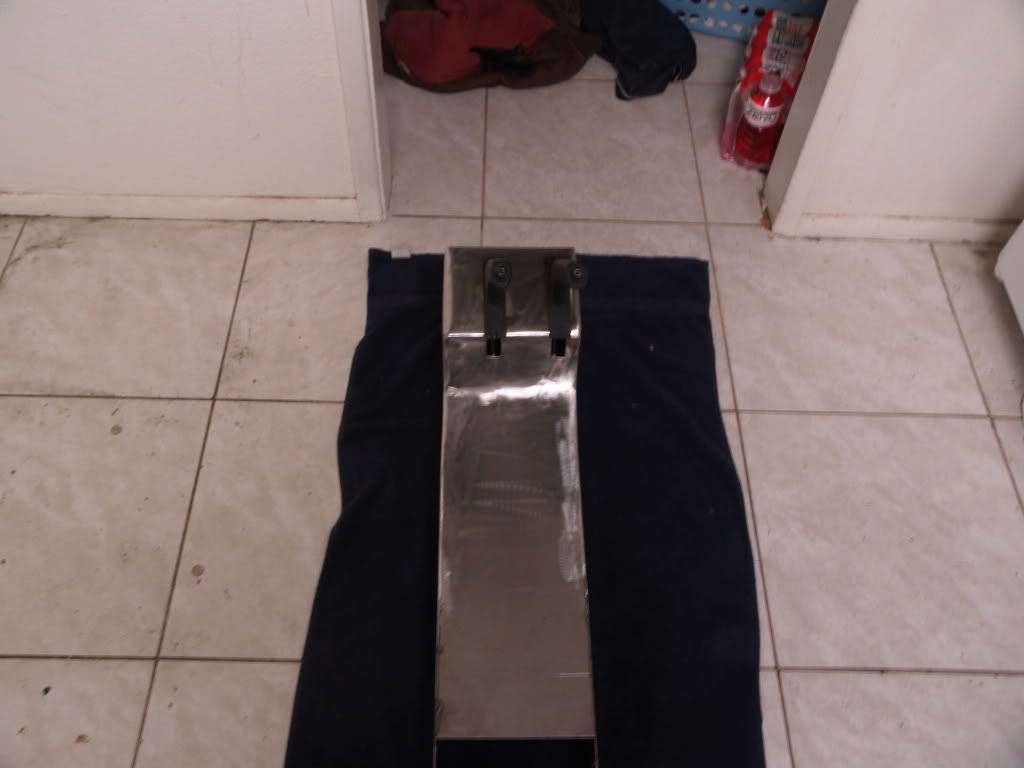 |
|
|
|
|
 Logged
|
|
|
|
theking
KI6WTF
Global Moderator
Hero Member
 Offline
Posts: 707

|
|
« Reply #76 on: January 27, 2012, 02:36:46 AM » |
|
I've always wanted to try that with the e-brakes. Good idea!
|
|
|
|
|
Logged
|
|
|
|
SteeevO
Rugged Rocks Founder
Administrator
Hero Member
 Offline
Posts: 3561
I'll tell you a story!
|
|
« Reply #77 on: January 27, 2012, 01:51:40 PM » |
|
I still don't know why i didn't think about this a long time ago.. haha awesome idea  |
|
|
|
|
Logged
|
Rugged Rocks Newsletter | Check out my articles on CrawlerNews.com!------------------------------------------ "When you hit the tree between the headlights thats understeer. Oversteer is when you hit the tree between the Tail Lights"
|
|
|
|
Oz
Guest
|
|
« Reply #78 on: January 28, 2012, 12:34:40 AM » |
|
that's frigging awesome
|
|
|
|
|
Logged
|
|
|
|
penski61
22nd Expeditionary Group
Hero Member
Offline
Posts: 970
|
|
« Reply #79 on: January 28, 2012, 07:42:17 PM » |
|
|
|
|
|
|
Logged
|
|
|
|
BlackX
KI6WUV
22nd Expeditionary Group
Hero Member
Offline
Posts: 1100
|
|
« Reply #80 on: January 28, 2012, 11:53:16 PM » |
|
Looks great. I've always wanted to incorporate my cb and ham into the center console. Looks like you're out of room though.
|
|
|
|
|
Logged
|
|
|
|
penski61
22nd Expeditionary Group
Hero Member
Offline
Posts: 970
|
|
« Reply #81 on: February 05, 2012, 06:38:37 PM » |
|
|
|
|
|
|
Logged
|
|
|
|
theking
KI6WTF
Global Moderator
Hero Member
Offline
Posts: 707
|
|
« Reply #82 on: February 06, 2012, 01:48:43 AM » |
|
I've never stick welded. Looks pretty good to me. Why'd ya go with stick and not Mig. Nickel rod?
|
|
|
|
|
Logged
|
|
|
|
penski61
22nd Expeditionary Group
Hero Member
Offline
Posts: 970
|
|
« Reply #83 on: February 06, 2012, 08:20:42 AM » |
|
went with stick cause my mig is gas less and only 115v , i was able to make a much larger bead faster with arc vs mig as well
|
|
|
|
|
Logged
|
|
|
|
SteeevO
Rugged Rocks Founder
Administrator
Hero Member
Offline
Posts: 3561
I'll tell you a story!
|
|
« Reply #84 on: February 06, 2012, 01:51:22 PM » |
|
nice, that came out pretty good.  |
|
|
|
|
Logged
|
Rugged Rocks Newsletter | Check out my articles on CrawlerNews.com!------------------------------------------ "When you hit the tree between the headlights thats understeer. Oversteer is when you hit the tree between the Tail Lights"
|
|
|
|
Nissan Off Road & 4x4 Forum
|
|
« Reply #84 on: February 06, 2012, 01:51:22 PM » |
|
|
|
|
|
|
Logged
|
|
|
|
penski61
22nd Expeditionary Group
Hero Member
Offline
Posts: 970
|
|
« Reply #85 on: February 11, 2012, 07:09:20 PM » |
|
well i went ahead and returned the kingpin knuckles and ill order up new ball joint knuckles and high steer arms , this saved me about $550 got some more done on the housing , drilled and tapped for the arb , got the inner c's welded on with shock mounts and started on the ram mount should have the ruff stuff diff cover next week 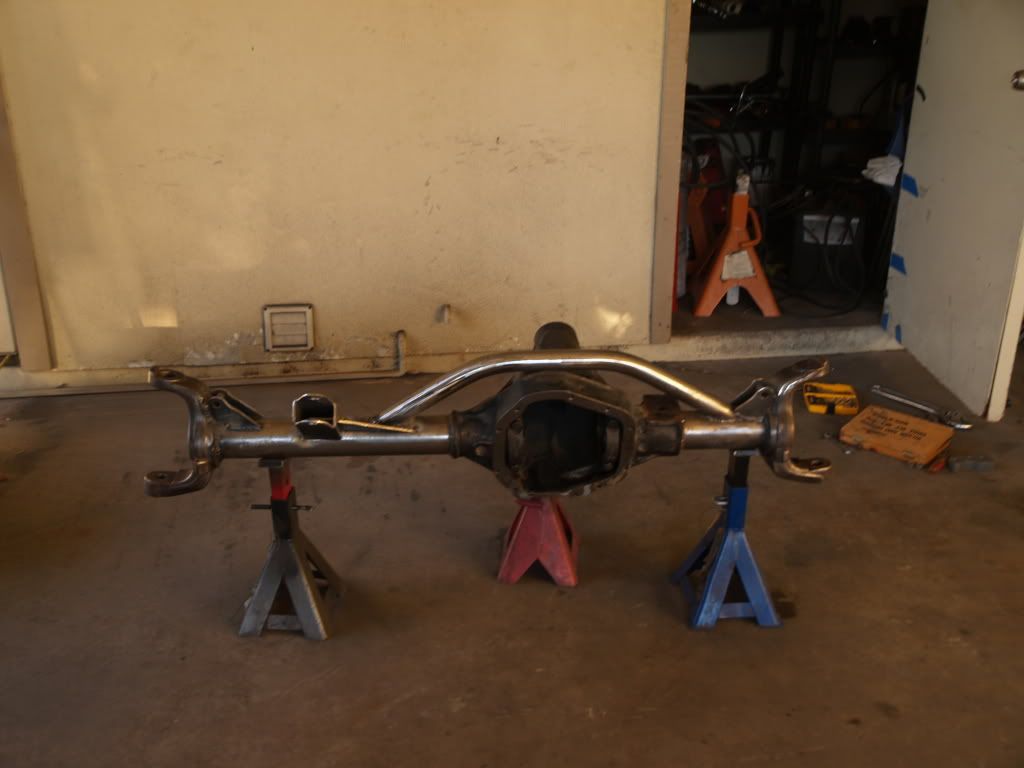 |
|
|
|
|
Logged
|
|
|
|
penski61
22nd Expeditionary Group
Hero Member
Offline
Posts: 970
|
|
« Reply #86 on: February 15, 2012, 09:19:08 PM » |
|
got the atlas put in today , the trans jack slipped out from under the atlas so i ended up catching it on my chest then bench pressing the freaking thing into place which was fun lol here is the 2nd portion of the center console im working on , i may have to re-do it and drop the portion down where the atlas shifters are so the cables fit but ill find out more tomorrow 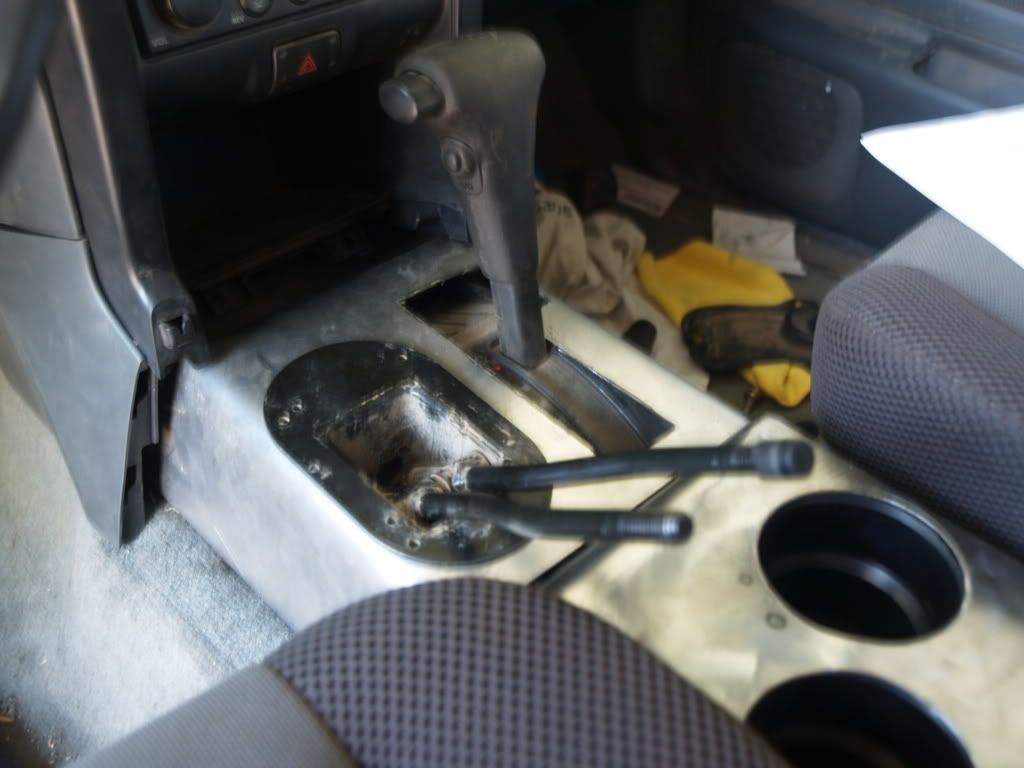 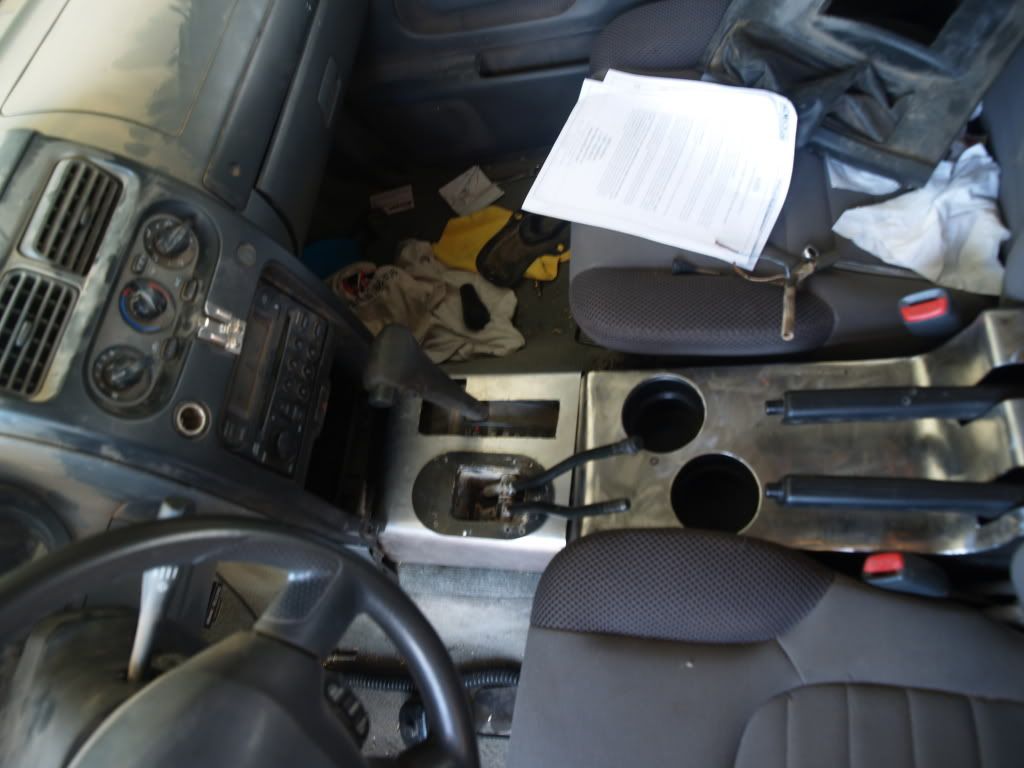 |
|
|
|
|
Logged
|
|
|
|
SteeevO
Rugged Rocks Founder
Administrator
Hero Member
Offline
Posts: 3561
I'll tell you a story!
|
|
« Reply #87 on: February 16, 2012, 12:18:04 PM » |
|
nice!
Shifter should feel and operate well mounted like that.
how are you keeping the center console to the floor?
|
|
|
|
|
Logged
|
Rugged Rocks Newsletter | Check out my articles on CrawlerNews.com!------------------------------------------ "When you hit the tree between the headlights thats understeer. Oversteer is when you hit the tree between the Tail Lights"
|
|
|
penski61
22nd Expeditionary Group
Hero Member
Offline
Posts: 970
|
|
« Reply #88 on: February 16, 2012, 07:40:21 PM » |
|
well this version didnt work , the shifter cables basically need to run along the floor in order to keep the box level otherwise when i put the box up higher the cables pull the front of the box down
in order to keep the box where i want it ill just lower it and make the console step down cause i didnt really feel like cutting another hole up under the dash , especially next the ecu
ill get some more metal tomorrow or Saturday and I'll have version 2 probably done later Saturday
|
|
|
|
« Last Edit: February 16, 2012, 07:42:02 PM by penski61 »
|
Logged
|
|
|
|
theking
KI6WTF
Global Moderator
Hero Member
Offline
Posts: 707
|
|
« Reply #89 on: February 16, 2012, 11:09:28 PM » |
|
I'd just weld it. lol
Hey, that D60 truss looks like it will limit your uptravel quite a bit with the oil pan. I would see if you can put the upper link bracket on just the driver side tube and not run a truss at all.
|
|
|
|
|
Logged
|
|
|
|
penski61
22nd Expeditionary Group
Hero Member
Offline
Posts: 970
|
|
« Reply #90 on: February 16, 2012, 11:54:32 PM » |
|
it hasn't been that long since you worked on my tuck lol , but the axle is about 3" away from the oil pan and this truss is about the same height as the one you did for the d44 so i dont see having any issues with up travel
|
|
|
|
|
Logged
|
|
|
|
penski61
22nd Expeditionary Group
Hero Member
Offline
Posts: 970
|
|
« Reply #91 on: February 18, 2012, 05:29:15 PM » |
|
had to change the design from above so that the shifter box would mount to the floor instead of the console here is the shifter box with some mounts i made up to bolt it to the floor  and the finished look , except the shifter knobs those are getting replaced 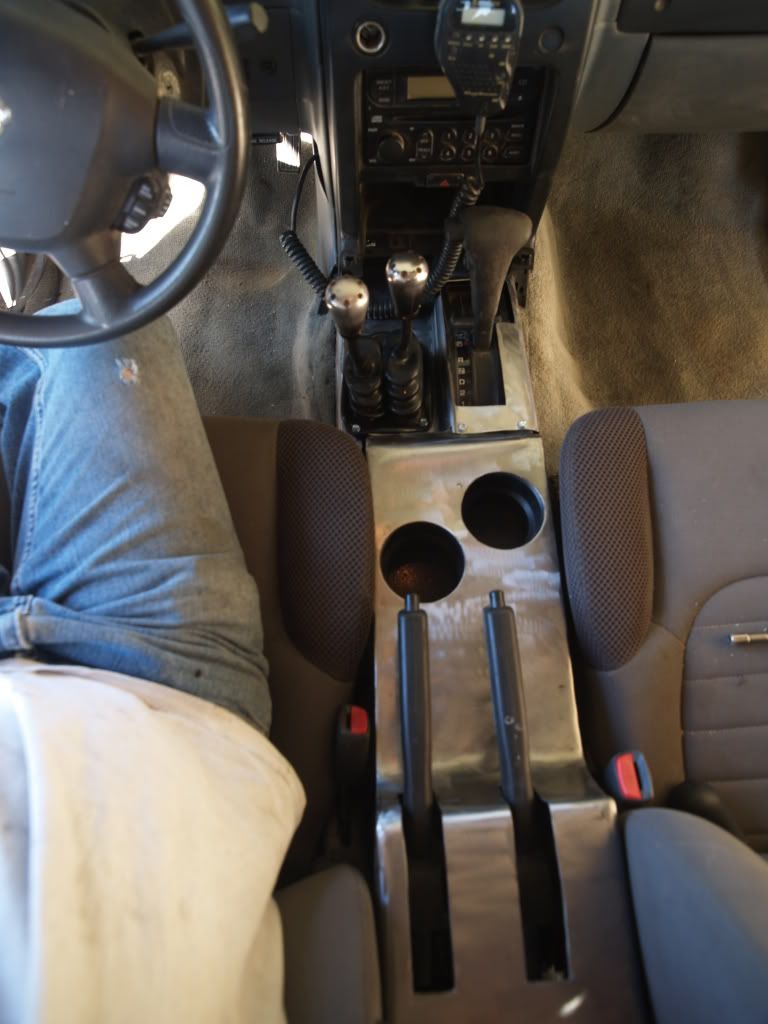 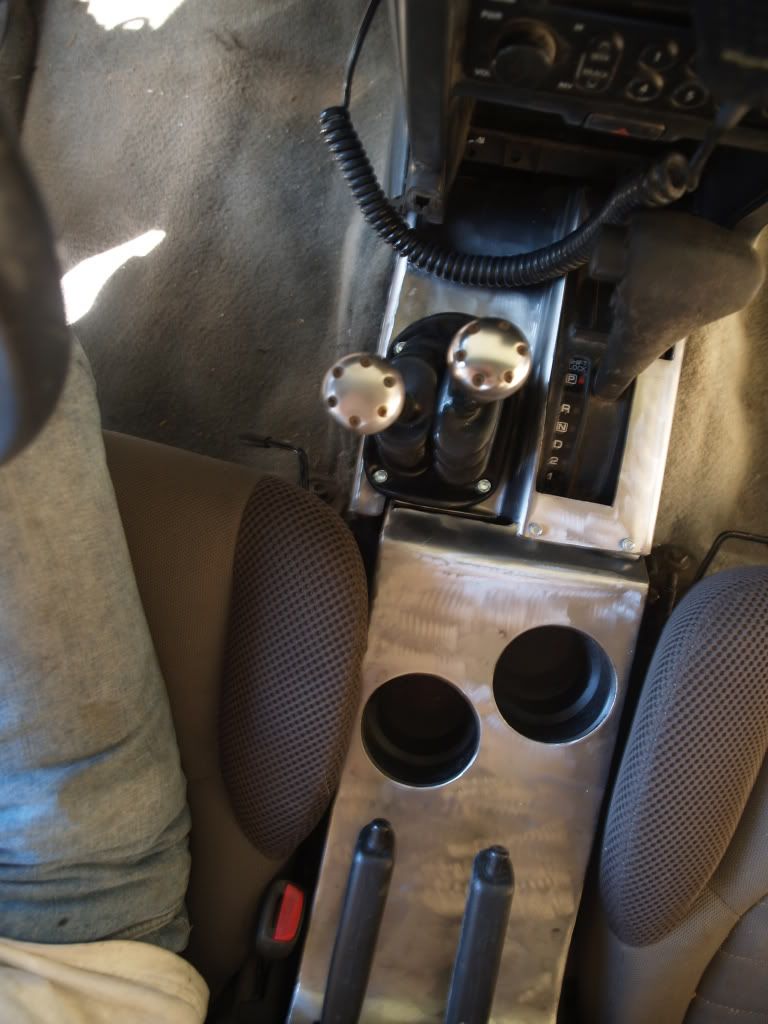 |
|
|
|
|
Logged
|
|
|
|
SteeevO
Rugged Rocks Founder
Administrator
Hero Member
Offline
Posts: 3561
I'll tell you a story!
|
|
« Reply #92 on: February 21, 2012, 03:44:20 PM » |
|
thats one hell of a set up... so awesome.
|
|
|
|
|
Logged
|
Rugged Rocks Newsletter | Check out my articles on CrawlerNews.com!------------------------------------------ "When you hit the tree between the headlights thats understeer. Oversteer is when you hit the tree between the Tail Lights"
|
|
|
penski61
22nd Expeditionary Group
Hero Member
Offline
Posts: 970
|
|
« Reply #93 on: February 21, 2012, 03:57:47 PM » |
|
ended up pulling the atlas today because of a leak on the adapter-atlas side went ahead and clocked it another hole so now the atlas does'nt touch the body and i can still get the skid on |
|
|
|
|
Logged
|
|
|
|
BlackX
KI6WUV
22nd Expeditionary Group
Hero Member
Offline
Posts: 1100
|
|
« Reply #94 on: February 21, 2012, 05:30:15 PM » |
|
Another great job. Really put a smile on my face seeing that set up.
|
|
|
|
|
Logged
|
|
|
|
penski61
22nd Expeditionary Group
Hero Member
Offline
Posts: 970
|
|
« Reply #95 on: February 29, 2012, 09:59:16 PM » |
|
new shift knobs installed  got the ruff stuff diff cover modified , kind of hard to tell but there are (2) 1/4" allen head screws on the bottom of the cover 1 in the center and one to the right i may roll the 44 out from under the truck and get the 60 mocked up so i can get the lower link brackets, pan hard bar and hydro assist brackets on then go ahead and pull it back off and paint it 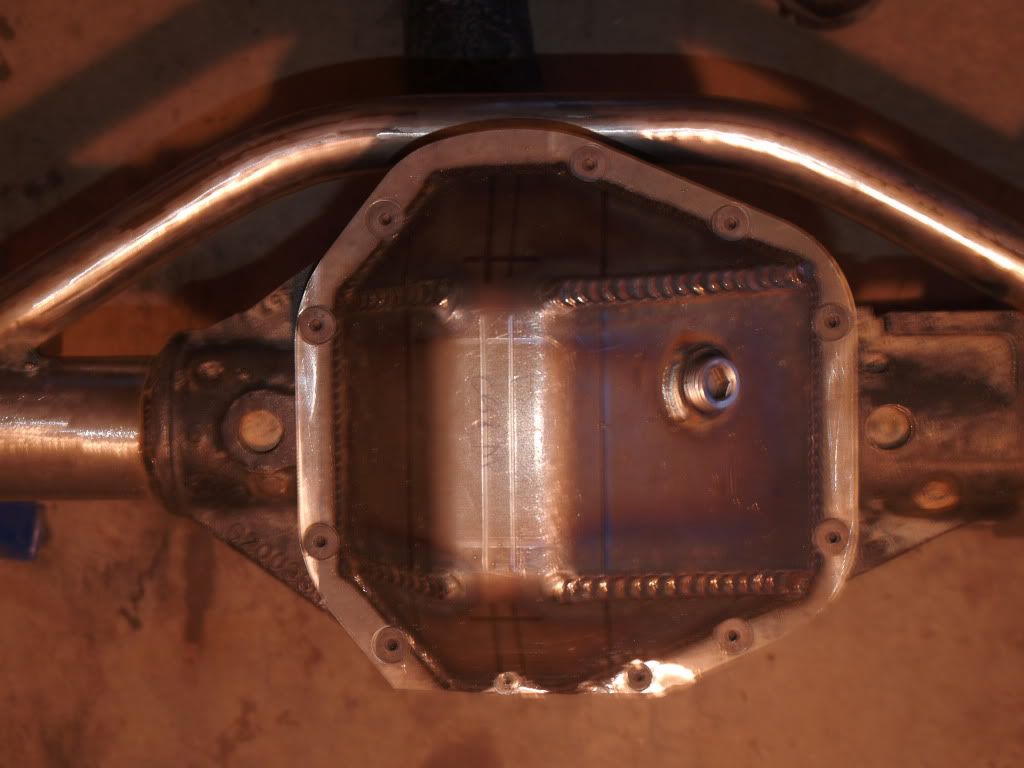 |
|
|
|
|
Logged
|
|
|
|
penski61
22nd Expeditionary Group
Hero Member
Offline
Posts: 970
|
|
« Reply #96 on: March 04, 2012, 03:07:31 PM » |
|
high steer arm i made up 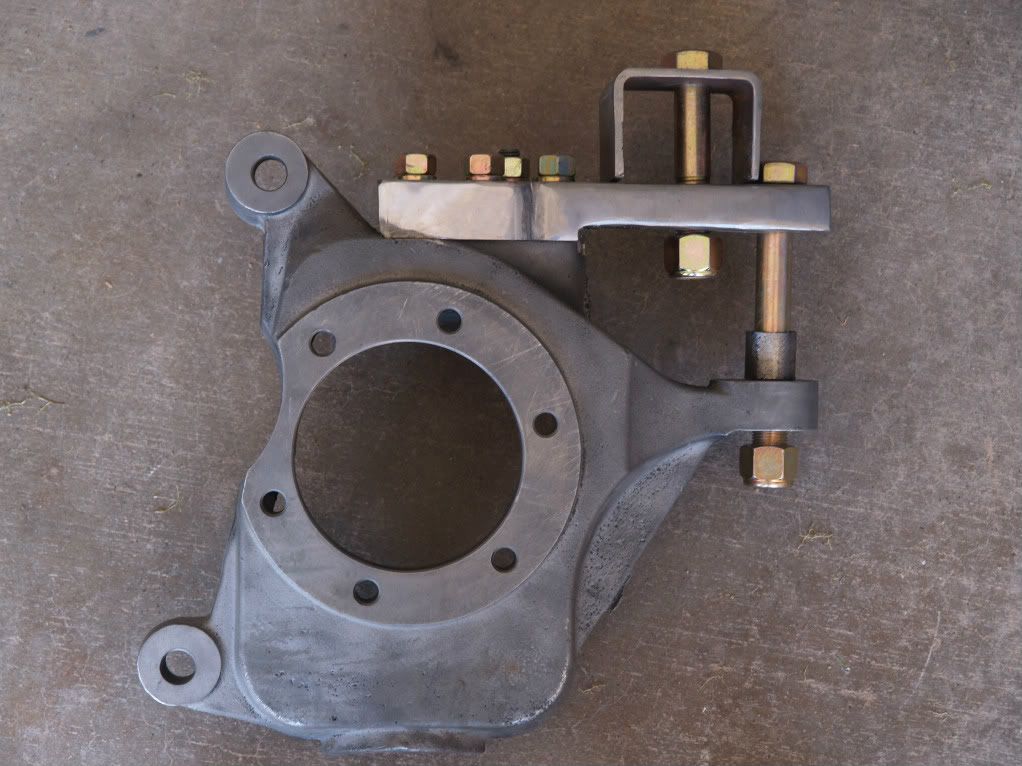 |
|
|
|
|
Logged
|
|
|
|
penski61
22nd Expeditionary Group
Hero Member
Offline
Posts: 970
|
|
« Reply #97 on: March 18, 2012, 06:00:37 PM » |
|
D44 was sold today and all the brackets for the D60 are finally done , so i got it out from under the truck and started painting 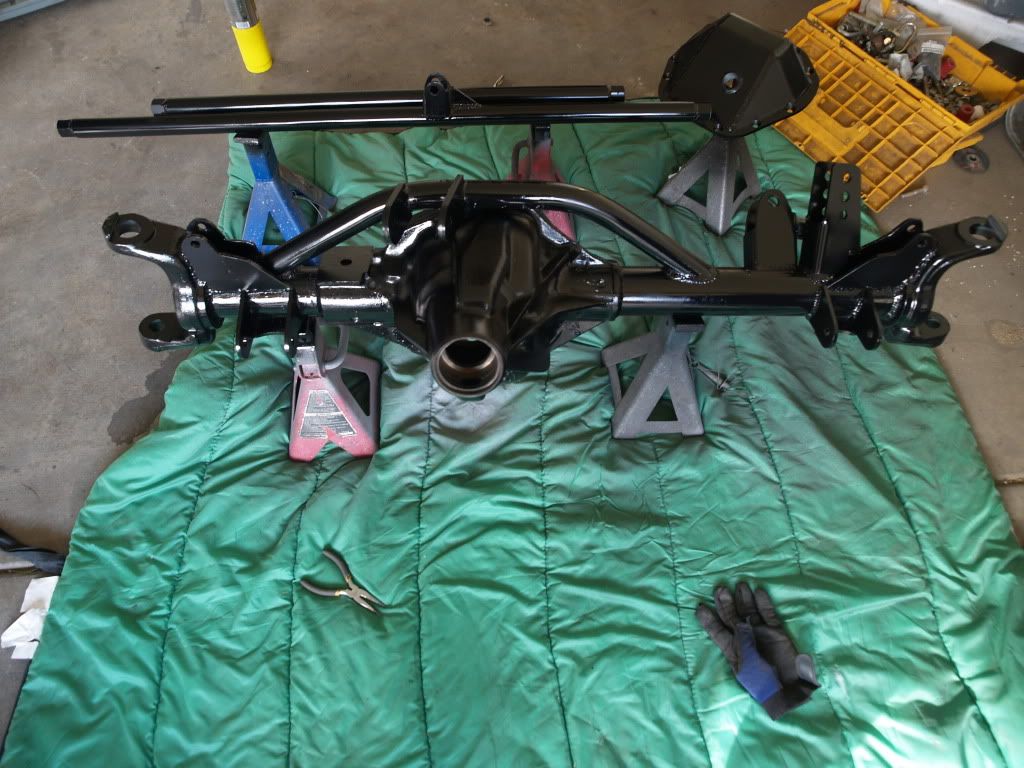 |
|
|
|
|
Logged
|
|
|
|
theking
KI6WTF
Global Moderator
Hero Member
Offline
Posts: 707
|
|
« Reply #98 on: March 18, 2012, 09:32:50 PM » |
|
how did you cut that thick steel for the high steer arm? I'd use lot's of red locktight or something to keep that arm from loosening up. I've seen a few KOH rigs with arms fully welded to the knuckle, which I thought was interesting.
|
|
|
|
|
Logged
|
|
|
|
penski61
22nd Expeditionary Group
Hero Member
Offline
Posts: 970
|
|
« Reply #99 on: March 18, 2012, 10:03:03 PM » |
|
the arm is keyed as well but i don't think it will loosen up since i put the studs on first and had to use a hammer to get it down to the knuckle lol i plan on using red lock tite though and the arm will be tied into the steering knuckle with the drag link and tie rod heims in double sheer with a F911 bolt the pic from above isn't how i plan on running the steering anymore , it will be like this  |
|
|
|
« Last Edit: March 18, 2012, 10:05:56 PM by penski61 »
|
Logged
|
|
|
|
|
Nissan Off Road & 4x4 Forum
|
|
|
|
|
|
Logged
|
|
|
|
|