penski61
22nd Expeditionary Group
Hero Member

 Offline Offline
Posts: 970
|
 |
« on: February 23, 2013, 04:19:49 PM » |
|
|
|
|
|
|
 Logged
|
|
|
|
penski61
22nd Expeditionary Group
Hero Member
Offline
Posts: 970
|
|
« Reply #1 on: February 23, 2013, 04:20:24 PM » |
|
|
|
|
|
|
Logged
|
|
|
|
penski61
22nd Expeditionary Group
Hero Member
Offline
Posts: 970
|
|
« Reply #2 on: February 23, 2013, 04:20:53 PM » |
|
|
|
|
|
|
Logged
|
|
|
|
penski61
22nd Expeditionary Group
Hero Member
Offline
Posts: 970
|
|
« Reply #3 on: February 23, 2013, 04:21:22 PM » |
|
started on the brake system today drained the fluid from the lines and the master cylinder , checked to see if the dodge master cylinder would bolt up and it did not . 2nd gens have a weird mounting pattern so i had to remove the brake booster , drill and tap the booster then install studs to run the dodge mc after i got it bolted up found there wasn't any way of adjusting the push rod to get it set correctly for the dodge mc so i used a dremel and cut the end of the push rod off and found it was an insert . removed the insert and found a portion of the push rod was hollow so i drilled and tapped it then installed a thread push rod now that the mc is taken care i need to order and adapter so i can run the pressure off a tee in the line  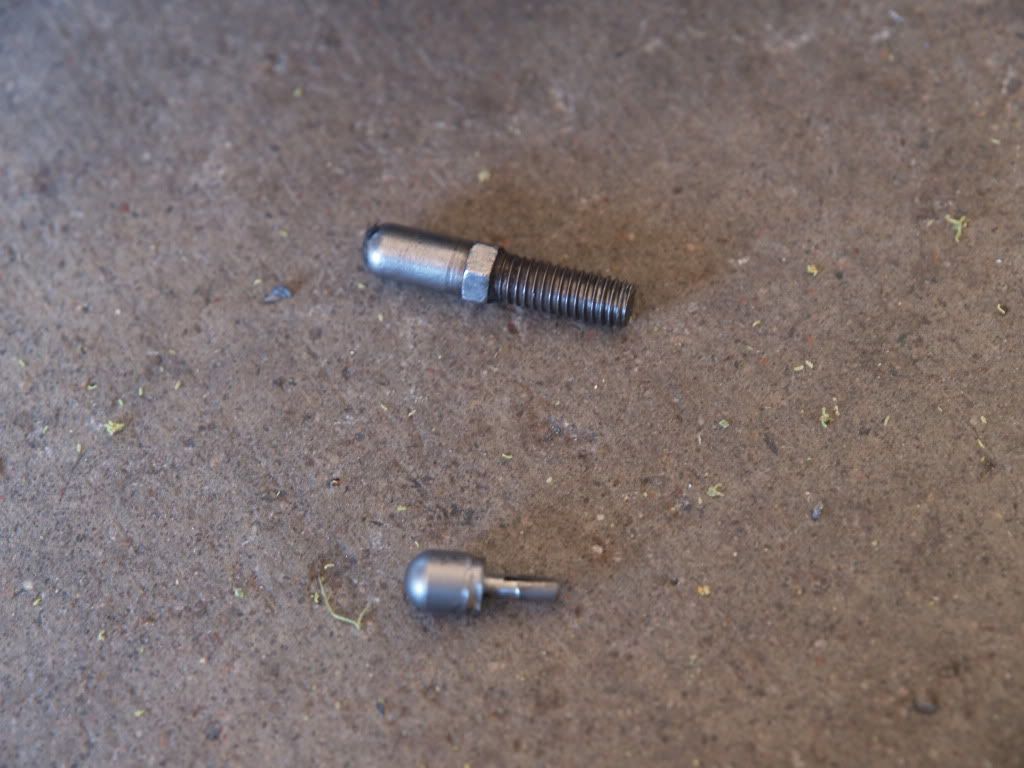 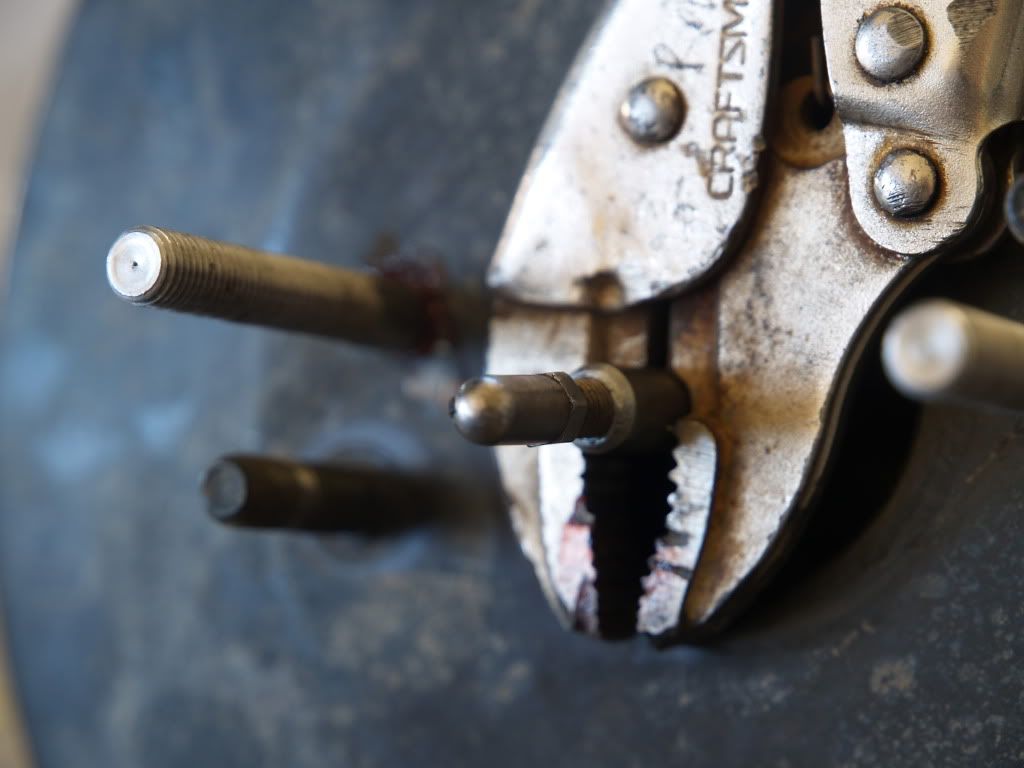 all bolted up 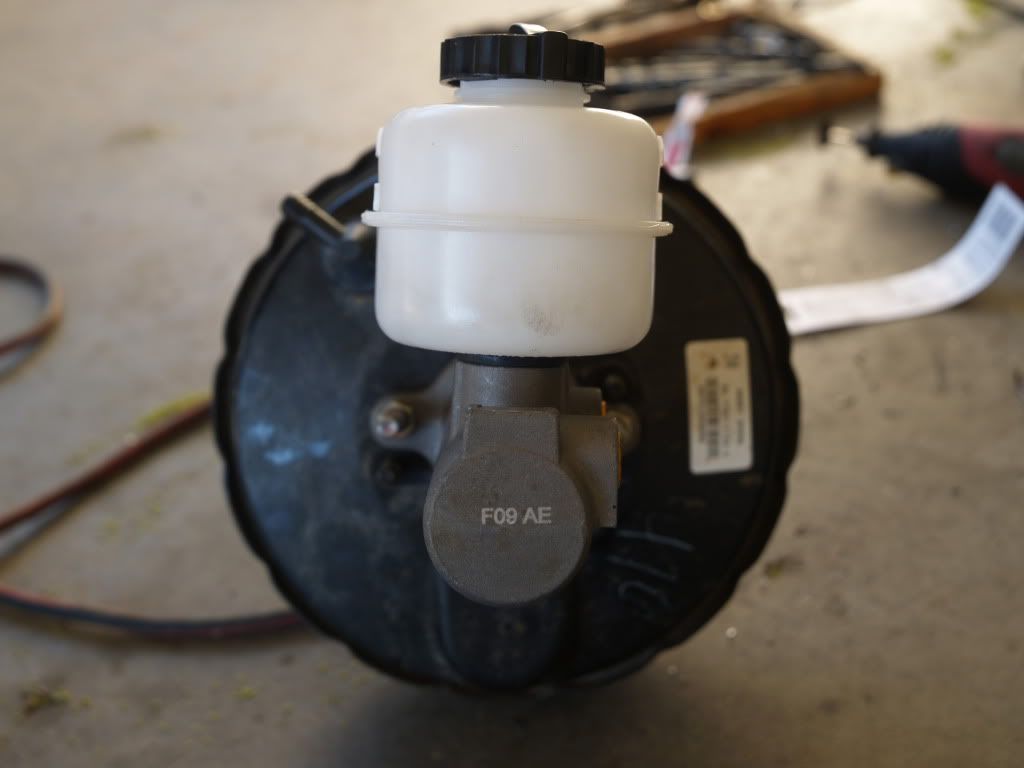 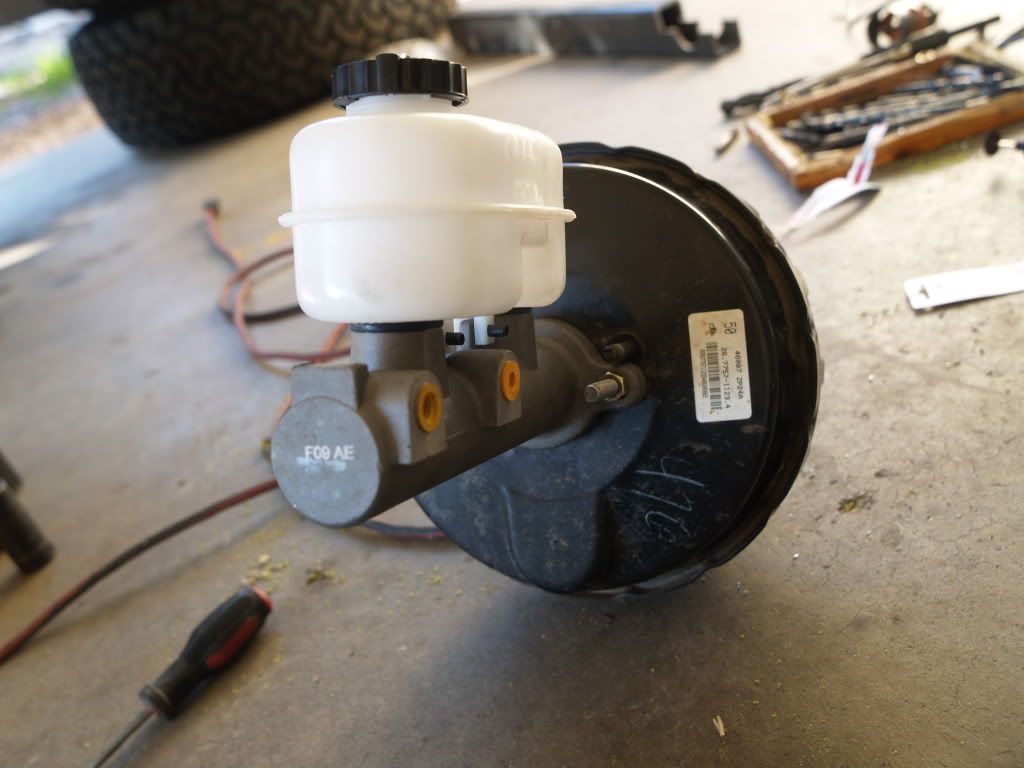 |
|
|
|
|
Logged
|
|
|
|
penski61
22nd Expeditionary Group
Hero Member
Offline
Posts: 970
|
|
« Reply #4 on: March 03, 2013, 05:26:34 PM » |
|
got the brakes bled , little soft but will see how they are on road decided to move all the abs sensors to one wheel because we are getting an atlas i didn't want to mess with making a new cross member and bracket along with pressing on a tone ring so i made a custom tone ring that fits over the rear hub , tone ring started as 1/4" flat stock 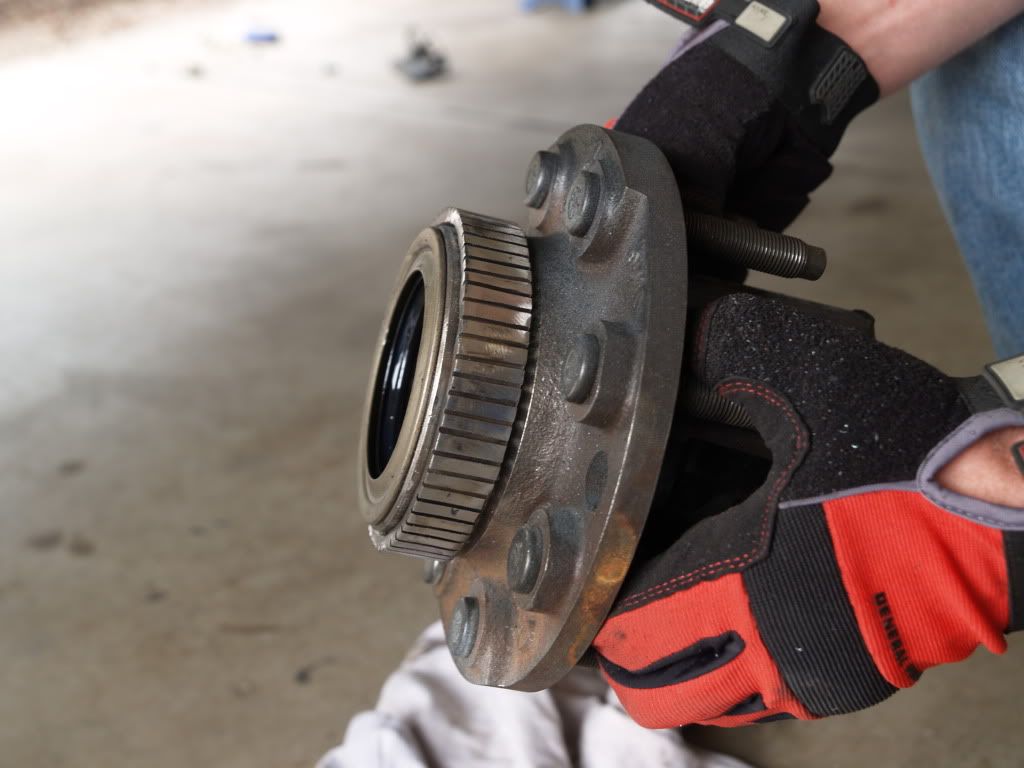 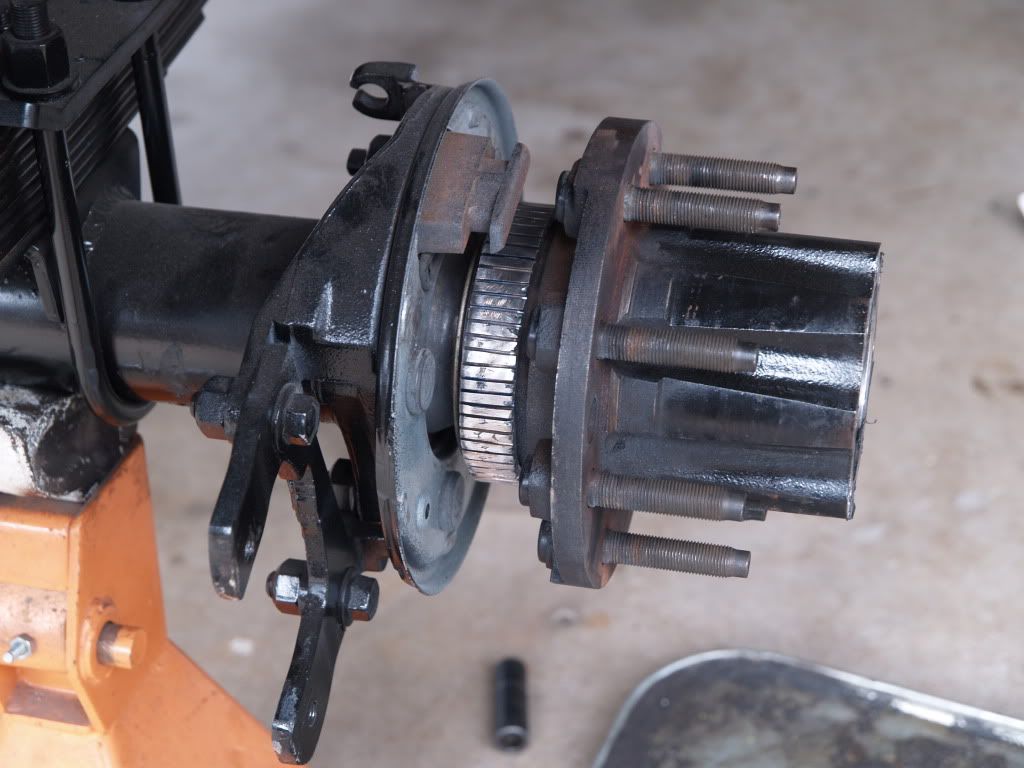 |
|
|
|
|
Logged
|
|
|
|
penski61
22nd Expeditionary Group
Hero Member
Offline
Posts: 970
|
|
« Reply #5 on: March 03, 2013, 09:06:03 PM » |
|
here are the mounts and then the abs sensors installed 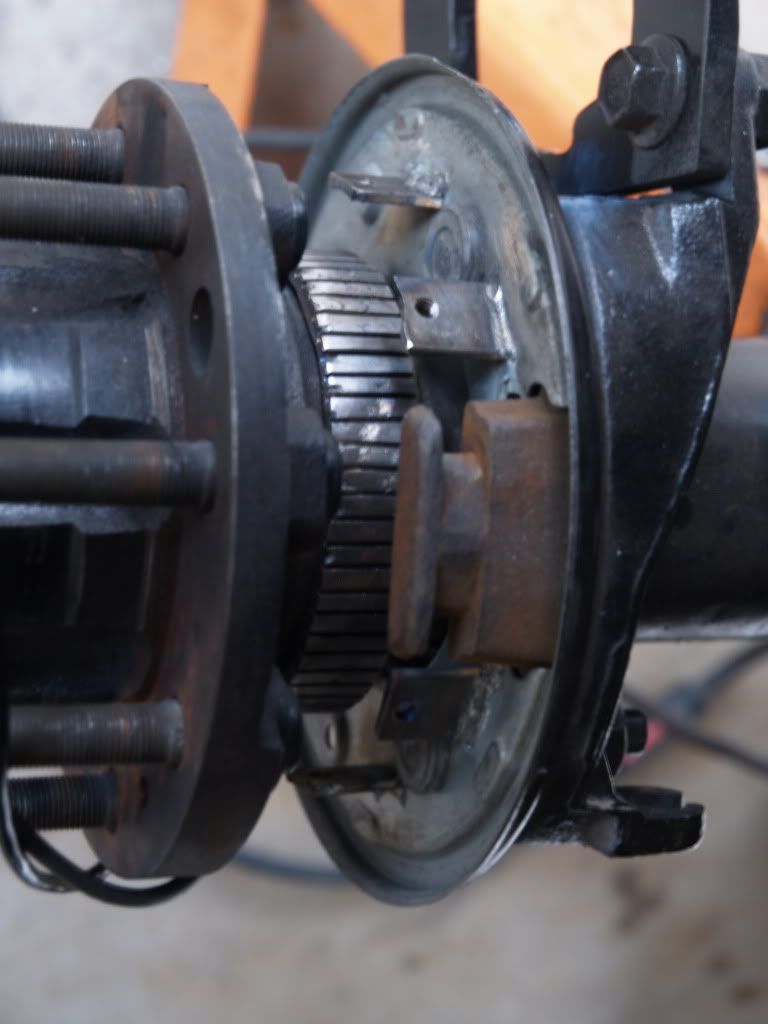 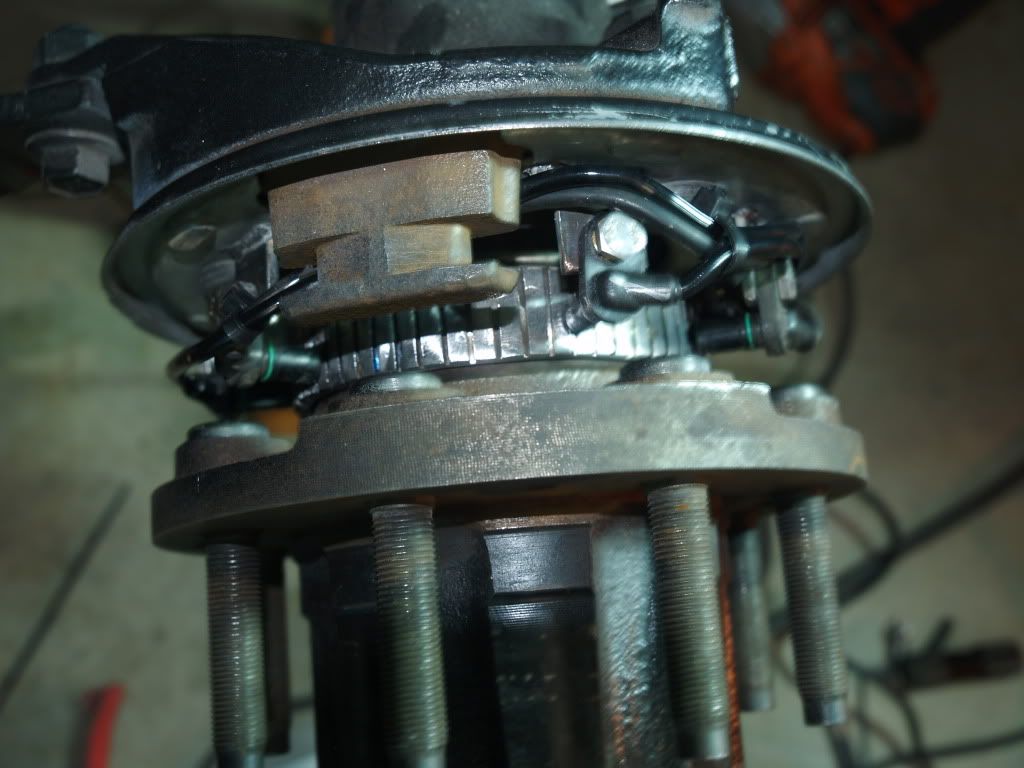 |
|
|
|
|
Logged
|
|
|
|
theking
KI6WTF
Global Moderator
Hero Member
 Offline
Posts: 707

|
|
« Reply #6 on: March 03, 2013, 09:43:29 PM » |
|
neat! I like the method! I'm thinking that those gaps aren't wide enough for the sensors to read, though.
|
|
|
|
|
Logged
|
|
|
|
penski61
22nd Expeditionary Group
Hero Member
Offline
Posts: 970
|
|
« Reply #7 on: March 03, 2013, 10:41:22 PM » |
|
ill find out in a couple days , if they dont read i can just widen the gaps with a grinding wheel instead of the cut off wheel
|
|
|
|
|
Logged
|
|
|
|
penski61
22nd Expeditionary Group
Hero Member
Offline
Posts: 970
|
|
« Reply #8 on: March 04, 2013, 07:24:27 PM » |
|
well the test worked out good enough to spend the money to get a machine shop to make a tone ring
anyone know any good machine shops lol
|
|
|
|
|
Logged
|
|
|
|
theking
KI6WTF
Global Moderator
Hero Member
Offline
Posts: 707
|
|
« Reply #9 on: March 04, 2013, 08:15:08 PM » |
|
If you had a torchmate you could stack a few gear patterns together to make a nice tone ring. btw, i'm getting a torchmate.  |
|
|
|
« Last Edit: March 04, 2013, 08:19:23 PM by theking »
|
Logged
|
|
|
|
|
Nissan Off Road & 4x4 Forum
|
|
« Reply #9 on: March 04, 2013, 08:15:08 PM » |
|
|
|
|
|
|
Logged
|
|
|
|
penski61
22nd Expeditionary Group
Hero Member
Offline
Posts: 970
|
|
« Reply #10 on: March 26, 2013, 06:16:57 PM » |
|
one of the guys at Natalie's work offered to design and cut the tone ring here it is , done with an edm machine 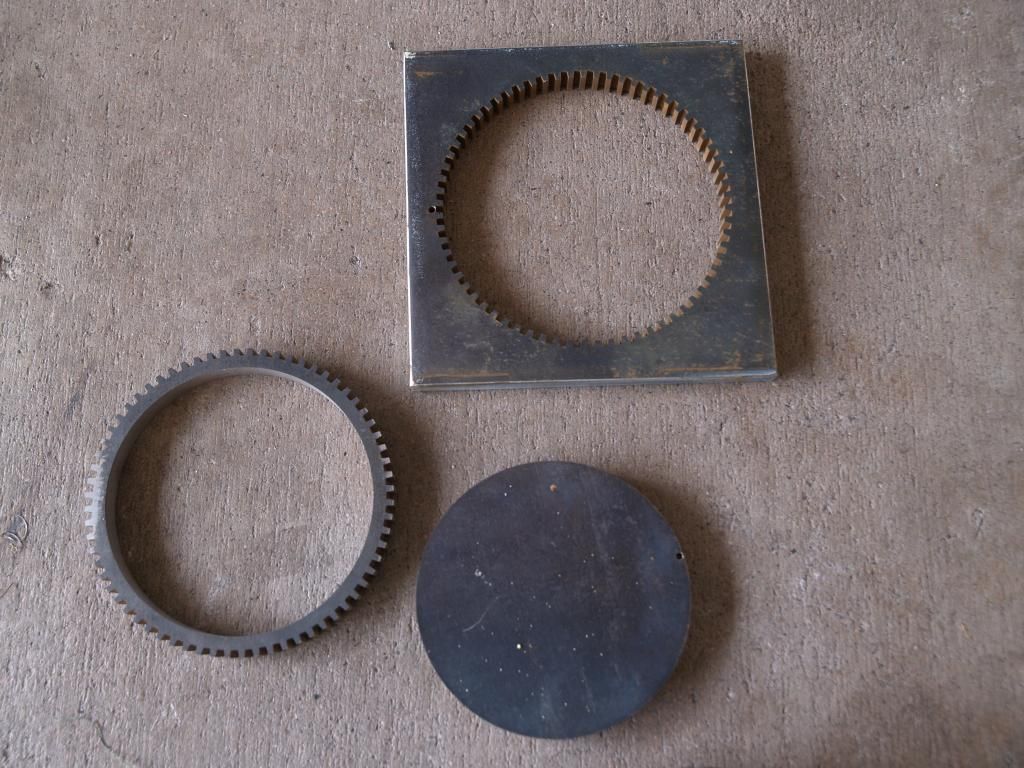 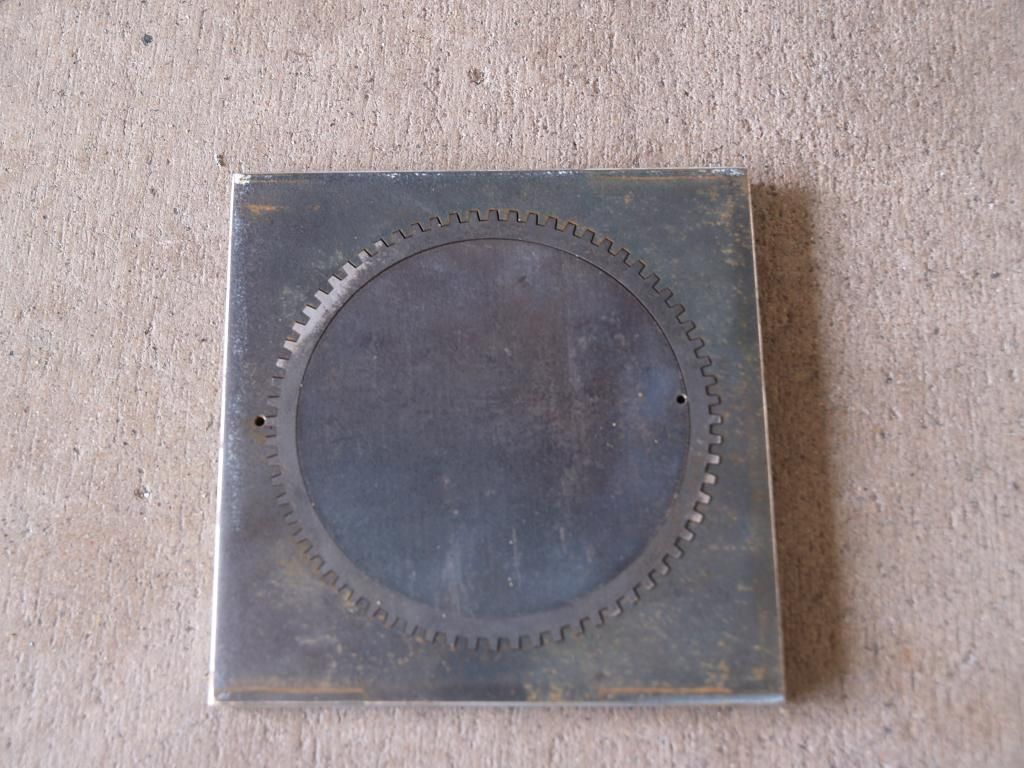 then almost done with the bumper , i was able to salvage the bumper i had before with the body lift  |
|
|
|
|
Logged
|
|
|
|
theking
KI6WTF
Global Moderator
Hero Member
Offline
Posts: 707
|
|
« Reply #11 on: March 26, 2013, 09:21:42 PM » |
|
wow! that some precise cutting! What do they normally do there with that EDM machine?
|
|
|
|
|
Logged
|
|
|
|
penski61
22nd Expeditionary Group
Hero Member
Offline
Posts: 970
|
|
« Reply #12 on: March 26, 2013, 09:31:05 PM » |
|
manufacturing parts of a mold for medical devices
|
|
|
|
|
Logged
|
|
|
|
penski61
22nd Expeditionary Group
Hero Member
Offline
Posts: 970
|
|
« Reply #13 on: April 16, 2013, 07:44:40 PM » |
|
|
|
|
|
|
Logged
|
|
|
|
theking
KI6WTF
Global Moderator
Hero Member
Offline
Posts: 707
|
|
« Reply #14 on: April 16, 2013, 08:52:53 PM » |
|
Hey Aaron. why not make the x-member one piece instead of bolting the front and back with bushings? That upper is gonna torque on those bushings. But, the upper link tabs aren't very tall so it's probably be Ok like that. But I think if you weld the two together it's be more rigid.  |
|
|
|
|
Logged
|
|
|
|
penski61
22nd Expeditionary Group
Hero Member
Offline
Posts: 970
|
|
« Reply #15 on: April 16, 2013, 09:06:59 PM » |
|
they aren't bushings its all rigid used a hole saw and cut a bunch of 1-1/2 holes out of 3/16 . used the pieces that fell out and welded them to the end of the tubing instead of using bushings then just drilled the holes out for 1/2" only bushing is in the trans mount , also i didn't want to make it once piece because if i have to take the atlas out i have to take the entire cross member out and then support the trans |
|
|
|
« Last Edit: April 16, 2013, 09:12:30 PM by penski61 »
|
Logged
|
|
|
|
penski61
22nd Expeditionary Group
Hero Member
Offline
Posts: 970
|
|
« Reply #16 on: April 16, 2013, 09:27:54 PM » |
|
ill probably add another cross brace from the tube behind the upper link to the frame for a little more strength
|
|
|
|
|
Logged
|
|
|
|
|
Nissan Off Road & 4x4 Forum
|
|
|
|
|
|
Logged
|
|
|
|
|